
 This is the second post in a series on easing the use of Joomla for your clients.
Throughout the series, I will go through some of the issues people have with using Joomla - and suggest ways to relieve the pain.
This part is about using images in Joomla. I'll look at some of the ways images can be added to Joomla in an easier way than in the default installation.
Joomla lacking image manipulation functions
One of the most annoying things about Joomla is the lack of image manipulation features. The core Joomla pack doesn't include a simple method for uploading images and resizing them on the fly. There is a function for uploading the images, but the way to insert images leaves a lot to be desired.
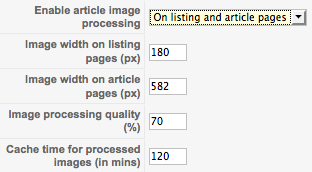
Of course, you can install a tool like JCE to get this feature. In particular, the subscription plug-in for JCE, Image Manage Extended, will give you better options for uploading an manipulating article images (see image below).

Joomla images are placed in the fulltext field
Still, the images of Joomla are inserted into the main text field (fulltext) of the Joomla article. This introduces some potential problems.
Firstly, the image might need some CSS added to be placed properly alongside text. This can be a daunting task for the novice Joomla user. Most people responsible for content do not have the neccessary skillset to do this or to understand what this involves. Especially if something unexpected happens. What should they change to fix a problem with image placement? This is the cause of a lot of frustration among content editors.
Secondly, the placement of images into the fulltext field of a Joomla article makes a redesign more complicated. For instance, if you want to change the first image of all article introtexts to be right align, you need to do the change in each article. Of course, if you enter a common class name to the images, you will be better off. But that will need to be communicated to the content editor. And this too, can be hard to remember or to understand.
So what can you do to relieve the content editor of this pain?
Solution 1: Content plug-ins
The easiest choice is to install an extension which manipulates the output of the Joomla content. Several extensions have the ability to take the first image of the article and manipulate it in some way. This means you can have one size for the image when shown on list pages (category blog layouts, for instance). In the article, the image can be shown in a different size, normally larger.
One extension that does this is the SuperBlogger plugin by JoomlaWorks. I use SuperBlogger on this blog.
In addition to the image manipulation, the plugin reformats the text and adds some classes that are be used for styling the content. These tags are added automatically.
Classes are also added to the images, and a lightbox function makes the image clickable to show a larger version. All of this happens without you doing anything to format the images. You still have to insert the image into the fulltext field, though.
There are a lot of additional features in SuperBlogger. Get a deeper look here.
There are some other extensions doing similar things:
- Raxo
An advanced news module for Joomla (commercial extension).
- EasyBlog
A full-fledged solution to blog with Joomla (commercial extension).
Solution 2: Content Creation Kits (CCKs)
The other option is to install a more advanced content component - or Content Construction Kit (CCK) - for Joomla. The most popular CCKs available are:
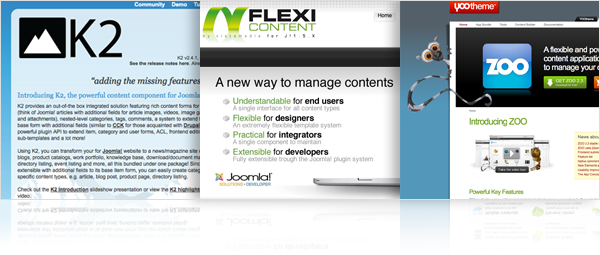
All of these solutions will let you add additional fields for data entry. They also have separate fields for the article main image. This makes it a lot easier for the user to enter data. The image is entered using a browse button. The extension will place the image into the content based on a combination of extension settings and CSS.
I've used both K2 and FlexiContent when building sites for clients. I haven't used Zoo, but from what I can see, the way it handles images is quite similar to K2 and FlexiContent. In this post, I will use K2 and FlexiContent as examples.
Separate image fields makes it easier for the user
The most obvious advantage of separate image fields, is how it simplifies the workflow for the user. In my experience, a lot of content on websites will need just one illustration. In the majority of cases, there is no need to add additional images to the article. Thus, the process of adding the image will consist of one step, as opposed to multiple steps when using the normal process.
Additional images
In the current version of K2, you can have only one image field. I know there are plans to add an image type to the Extra Fields in K2 in an upcoming version. For now, additional images will have to be added into the content field.
In FlexiContent, you can add multiple image fields. Each of these fields can be placed into a FlexiContent template at the discretion of the designer. Images can also be added to the content field.
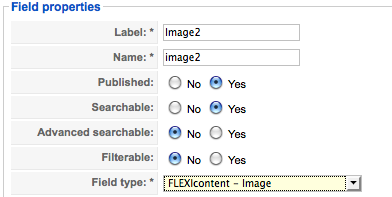
Image resizing
Another advantage of using a separate image field, is that the image can be manipulated in different ways. The most obvious way to manipulate an image is to change the size.
K2 does this by resizing the main item image to six different sizes. You can set the sizes for each version in the K2 main parametres.
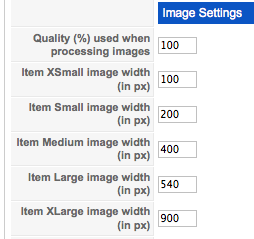
You can also set these sizes in an individual category to override the default sizes.
FlexiContent and Zoo do this in a similar way.
Image cropping
One function I would like to see in K2, is the image cropping function from FlexiContent. FlexiContent will let you set a cropped size for your images.
Let's say you have an image which is 600x300 (2:1) pixels. In the list view, I want the image to be shown as 180x60 (3:1) pixels. In the main item view (article view), I want to show the image in it's original proportions, but this time in 400x200 pixels. When clicking the image, I want the original image to appear.
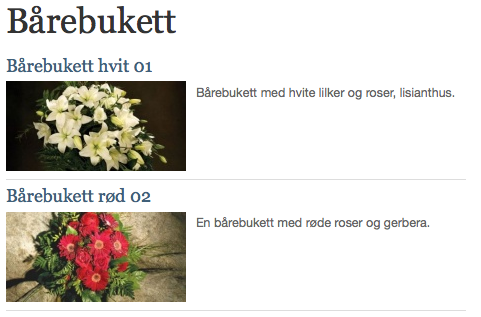
These below images show what I mean. In the first one (fig. 1), images of flowers are shown in a list. They are cropped according to the settings in the category.
In the next image (fig. 2), the image is shown without cropping (normal proportions) on the detail view of that particular flower.

This type of cropping can be done easily in FlexiContent. In K2, however, this function is missing. You can get the function when using certain modules to display K2 content (content modules), but not in the main component area (category and item views). Fotis and Lefteris, are you listening? ;)
So, as you can see - there are some alterntive ways of working with images in Joomla that are easier than the default one. I hope this post has inspired you to go look at some of the options out there. And that it will improve how you and your clients work with images.
The next part of this series will be about Content Management in Joomla. Stay tuned!